
You just got accepted to a US university and now your mom wants to know what’s next. No problem, Mom. We’ll explain everything! We’ve provided detailed information that applies to Dubai students accepted to universities (undergraduate, graduate, and MBA) in the United States.
Here are the next 10 steps in the process, taking you from acceptance to arrival.
1. Accept your university back by paying your deposit.
Once you’ve gotten accepted to a US university, you have to accept them as well. If you have received more than one acceptance and aren’t sure where you want to go, then check out our post on How to Choose Which University Acceptance to Accept.
Almost all universities complete the acceptance (or rejection) process by mid-June (for Fall semester) so you can wait a little while if you are unsure (each university will specify this date in their acceptance email).
Usually universities will put all the instructions to accept your acceptance in the email they sent you (or the 3 or more emails they will send in rapid succession after they accept you). Email them back with your confirmation or click a link to be taken to a page on their site where you submit an online enrollment form.
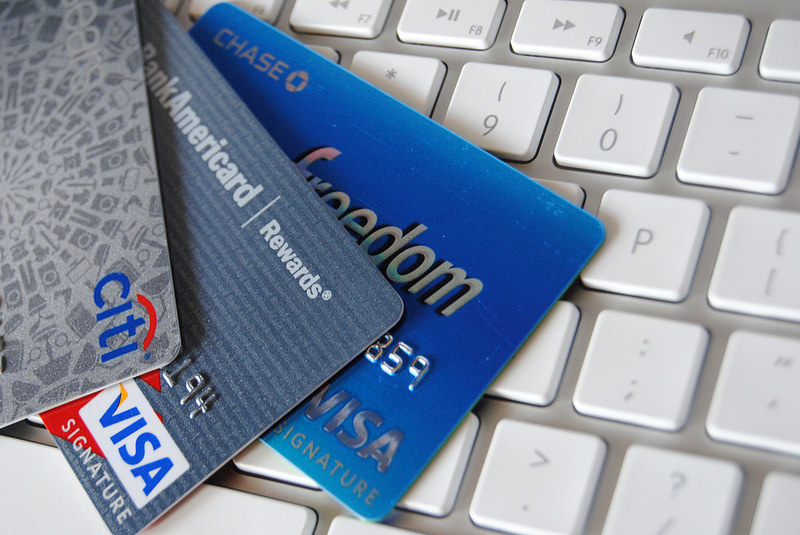
To make sure you’re serious, universities also usually require you to submit a deposit, about $600, online with a credit card.
2. Set up an online student account to get updates on the process.

One or more university emails will also prompt you to set up an online student account. Some universities use different ones from the account you used when you were applying, some use the same ones. No matter what, set up your online student account early in the process so you can see the updates as documents are received. There also may be things you need to do that you don’t receive an email about but should complete nevertheless.
3. Provide your financial verification.

This step is one of the most important after you get accepted to a US university because it affects just about everything that happens from here on. Every student accepted to a university in the United States is required to provide financial verification in order to receive a student visa.
The US government requires that student can prove they can pay for the entire first year of education (including tuition, fees, and housing) using liquid money sources. Basically, your parents (or sponsors) need to have that amount sitting in a bank account.
Click here to see a sample financial verification form.
Additional Documents for Financial Verification
You’ll be required to provide additional documentation:
If you have scholarships, you have to provide letters and information from the scholarship authority to show you don’t need to have the money. If you scholarship is only a partial scholarship, you have to show you have cash for the remaining portion of your education.
- Bank statements or letters (from banks where your parents, you, or sponsor hold an account) must show the actual amount of money available. This amount must be equal to or greater than the total cost based on 9 months listed by your university on the form.
- Your sponsor(s) must complete the “Statement of Financial Responsibility & I-20 Verification Form” given you by your university (usually downloadable from their website as a PDF.)
- Documents must be dated within one year of the start of your first term at the university.
- Documents must be in English; translations must be verified by an appropriate bank or government official.
Some of the requirements vary from university to university. We have seen universities that require bank letters from the bank manager rather than a form. Others required the forms to be notarized by a US registered notary that you can only find at the US Consulate in Dubai. Still others may have had you complete this step in the process when you apply, rather than after you are accepted.
Returning Your Financial Verification
Once you have completed your financial verification paperwork, you have to send it back to the university. Here are our tips:
- Complete 3 original sets of paperwork. You’ll need the same items for your visa interview in Dubai and they come in handy when you enter the US, so get 3 copies of bank statements and have 3 sets of forms signed. It would be really difficult to get these again later if you (or the university) lose them.
- If the form asks for an address, they usually mean physical address, not PO Box. Universities send the paperwork you need for your student visa by courier, so make sure you provided a physical address like “Jumeirah Lakes Towers, Tiffany Tower, Flat 515, Dubai, United Arab Emirates 99999.” (Dubai doesn’t have zip codes so you can leave that part blank or put 99999.)
- Courier your financial documents and forms. You need to make sure that the university receives them promptly and that you can track them if there are any issues. It’s better to pay Aramex or DHL to courier everything than have the university contact you later saying they did not receive the documents. Go through the Financial Aid Department’s website (or email or form) to verify the address to receive couriers. It won’t be the PO Box address.
4. Wait for your I-20 packet after getting accepted to a US university.

You completed step #3 so that you can receive an I-20 Application Packet (I-20 for short) from your university. The I-20 packet will allow you to schedule your visa interview and begin the process for you to receive a US student visa.
Keep in mind, you CANNOT schedule a visa interview before you receive this packet because you have to provide a number on a bar code from the packet.
In general, universities can issue an I-20 about 1-2 weeks after they receive your financial verification forms. Typically, they send all I-20s going to international addresses via UPS International, which usually reaches most countries within 5 business days.
5. Gather the documents for your visa interview.

Just because you’re waiting on your I-20 to arrive doesn’t mean you should be chillin’. It’s time to collect the documents for your visa interview. If you do this now, you can take the soonest interview and get this process over with quickly.
Visa Interview Documents
Here’s what you’ll need for the interview:
- Passport that is valid for at least 6 months and has one blank visa page
- High school transcripts or grade (mark) records (And official university transcripts if you were accepted into graduate or MBA programs)
- Official SAT, SAT Subject Test, GMAT, GRE, TOEFL, and/or IELTS scores (whatever you have)
- CV, Resume’, or student activities resume’ (if you have one)
- 1 photograph (see here for the requirements for US student visa photos)
- Acceptance letter from the university
- Scholarship letters if you have any
- Financial verification paperwork from step #3 (see we told you that you needed more originals!)
- Parents’ stuff: salary statements, employment letters, UAE residence visa copies, property deeds from the UAE and your home country, additional bank statements with big balances, investment statements, and anything else that might be able to prove you have sufficient funds AND ties to your home country (or the UAE)
Why do you need all this stuff? When you apply for a non-immigrant visa, the interviewing officer is allowed to presume that you plan to permanently stay in the U.S., unless you prove otherwise by demonstrating “ties to the home country.” You must gather enough evidence showing that you have these ties, usually through your family.
Your application will likely be denied if the Consular Officer believes you intend to stay in the U.S. after your studies. The more documents you can show, the better off you’ll be.
6. Once your I-20 packet arrives, schedule your student visa interview and pay your SEVIS Fee.

Once you have your I-20, you can apply for an F-1 student visa at a US Consulate in Dubai. If you will be a student, you cannot enter the U.S. on a visa that does not allow study (such as B-2, F-2, Visa Waiver Program, etc.).
We recommend that you schedule an appointment as soon as possible after you get your I-20. Processing times for visa issuance vary and may require additional time due to security checks.
Schedule the Visa Interview
To schedule your interview, you have to complete a DS-160 Application for a Non-Immigrant Visa online. You can read more about this on the US Consulate in Dubai’s website. Here are our tips:
- You need a digital photo to complete the application. You can take a selfie that meets the application photo requirements and have it ready before you start.
- Have your I-20 with you because you need the info on it.
- Be sure to save often because the application is long and you don’t want to lose your info.
- When you get to the confirmation page, print one copy and PDF the same page (if you can) because you need it for the visa interview.
Read all information on the I-20 carefully. Pay special attention to page two, where your legal responsibilities as an F-1 student in the United States are explained. Sign page one of the Form I-20, and provide the information requested if under 18 years of age.
SEVIS
Universities are required to enter accepted foreign students’ names into SEVIS, the Student and Exchange Visitors Information System. After you receive your I-20, you are required to pay a SEVIS fee online at https://www.fmjfee.com/. The fee is $200 and paid online by credit card.
When you get to the confirmation page, print one copy and PDF the same page (if you can) because you need it for the visa interview.
After you’ve completed your DS-160 and paid your SEViS fee, you’ll be directed to the official US visa information and appointment scheduling website. Any other updates you need on your visa will be found there. Ypu can also pay the $160 student visa application fee.
7. Ace your student visa interview.

In addition to the documents you collected in step #5, you need to bring the following to your visa interview:
- DS-160 online application confirmation page (good thing you PDFed)
- Original I-20 form from the university
- Photocopy of the I-20
- Proof of payment of SEVIS Fee (good thing you PDFed it too!)
The US Consulate in Dubai has provided some great information and the video below on what happens on interview day.
Here are our tips:
- Label every document you gathered with sticky notes and put them in a plastic folder so you keep everything neat and organized.
- Get familiar with your paperwork beforehand. You don’t want to be confused about what or where something is when the Consular Officer is asking you questions.
- Read these tips.
- Practice your interview beforehand. Here are a bunch of potential interview questions you should have answers to. The Consular Officer’s goal is to ensure you won’t stay in the US after you finish your education, so all of your answers need to support this point.
- Dress in business clothes or formals to create a great first impression. They need to know you take the process seriously.
- Don’t be nervous! You’re where you’re supposed to be and doing what you’re supposed to be doing so you’re probably going to get a visa.
Approved, Refused, or Pending Further Review?
You will find you that day if you have been approved, refused, or pending further review. In the past, our approved students gave their passports the same day and received the passport with visa stamp at home by courier 3 to 5 business days later.
If your application is marked pending, it could take a few weeks to a few months for the US Consulate to complete their review. Be sure to send an email to your university to keep them notified of the process. If you aren’t approved for a visa by the time school starts, you can start the next term or defer your admission and start the next Fall.
8. Pay your housing deposit.
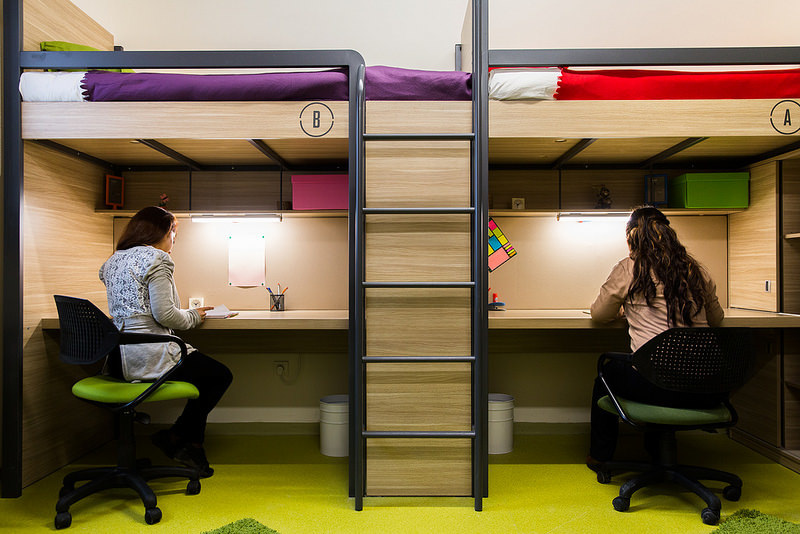
As soon as you receive an email from the Housing Department, pay your housing deposit. Getting university housing is an extremely competitive process and their is a chronic shortage of student housing. Although some universities guarantee all incoming freshmen a space in university housing if they want it, the best dorms always go first.
Do not get stuck with the old dorms on the dodgy side of campus. So, pay your deposit (usually about $600) as soon as you can.
9. Request your final transcript from your school.
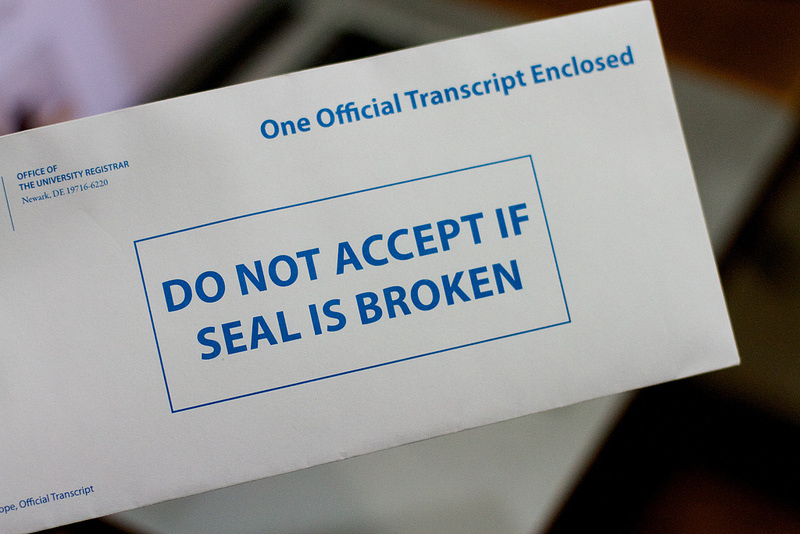
You’ve been accepted to university and properly have your student visa by now. However, most universities want a record of your grades from your last term or last year of high school.
Request an official copy of your transcript is sent to your university before you leave high school for good. (This won’t be necessary if you are a graduate or MBA applicant. You should already have an official transcript ready to send to your university.)
If your school won’t send one directly, ask for a transcript in a sealed envelope with the school’s address on it. The envelope must either have the school stamp or an administrator’s signature written over the flap.
10. Graduate and take a nice long vacation!

You finally made it! Graduation day is here and you’re getting ready to go to university. We recommend that you hang out with your family, party with your friends, and take a nice long vacation. Not only did you earn it, but you need to rest up. Starting university is an emotional, exciting, and scary experience (we know). You’re going to need to be at your best.
Need help applying to universities or getting a student visa?
Whatsapp us for the FREE consultation! We’ll talk you through the process and help you understand how we can make the entire process easier for you.
More from Apply Me
 How to Study for the Esade Admission Test for University
 How to Study for the IE University Admissions Test
 Bocconi Test Math: 27 Worksheets to Get You Ready!
 How to Study for the Bocconi Admission Test
 Kira Video Interview: 6 Tips to Help You Nail It
 LBS Dubai EMBA Resume’/CV: 5 Things Other Applicants Know